


How To Connect Claude AI with WordPress in 3 Minutes
Quick Answer: To connect Claude AI to WordPress, install the free Novamir plugin on your WordPress site, enable AI abilities in its configuration panel, copy the JSON configuration it generates, paste that code into the Claude Desktop app’s developer config file, save the file (not “Save As”), and fully restart Claude. The whole process takes under 3 minutes and works on both Windows and Mac — no coding required.
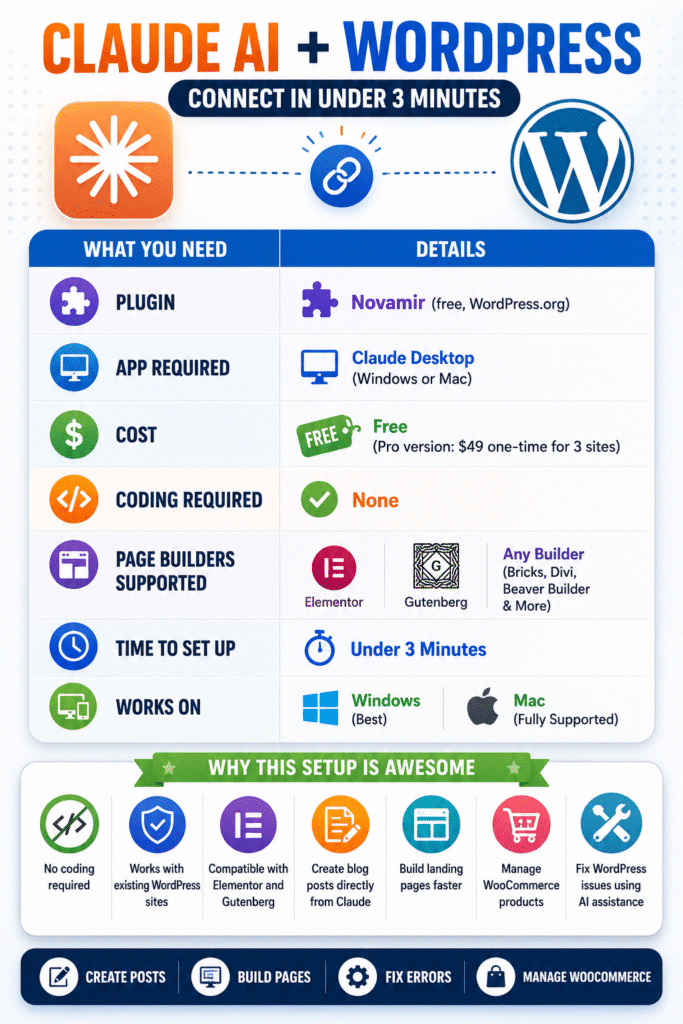
At a Glance
| What You Need | Details |
|---|---|
| Plugin | Novamir (free, WordPress.org) |
| App Required | Claude Desktop (Windows or Mac) |
| Cost | Free (Pro version: $49 one-time for 3 sites) |
| Coding Required | None |
| Page Builders Supported | Elementor, Gutenberg, any builder |
| Time to Set Up | Under 3 minutes |
| Works On | Windows (best) · Mac (fully supported) |
Trending: How To Get ChatGPT Plus For Free?
Why Would You Connect Claude AI withWordPress?
Most people think of Claude as a chatbot something you open in a browser tab to ask questions or draft emails. But when you connect Claude directly to your WordPress site, it becomes something much more useful: an AI agent that operates inside your dashboard.
That means you can tell Claude, in plain English, to create a blog post, build a landing page in Elementor, fix a broken shortcode, add a WooCommerce product, or restructure your navigation menu and it executes those tasks in your live WordPress environment, instantly.
No copy-pasting content between tabs. No wrestling with page builders. No calling a developer for a code fix at 11pm.
I’ve tested this on multiple WordPress installations across Windows and Mac, with both Elementor Free and Pro, and across Gutenberg-based sites. This tutorial covers everything I learned the hard way so you don’t have to.
What Do You Need to Connect Claude AI with WordPress?
Before starting, make sure you have these four things ready:
- A self-hosted WordPress website with admin access
- The Claude Desktop app installed on your Windows or Mac computer (download from claude.ai)
- The Novamir plugin
.zipfile downloaded from the Novamir website - About 3 minutes
That’s the complete list. No API keys to manually enter. No command-line tools. No developer experience needed.
Step 1: Download the Free Novamir Plugin
The entire Claude-to-WordPress integration runs through a free plugin called Novamir. It functions as an MCP (Model Context Protocol) bridge — essentially a secure channel that lets Claude Desktop communicate directly with your WordPress installation.
Go to the Novamir website and click Download for Free. The plugin downloads as a standard .zip file.
Novamir costs nothing to use for the core connection. A Pro version exists — I’ll cover exactly what it adds and whether it’s worth it later in this guide.
📷 Screenshot tip: You should see a single “Download for Free” button on the Novamir homepage. Alt text for this image: “Novamir plugin homepage with Download for Free button highlighted”
How Do You Install Novamir in WordPress?
- Log in to your WordPress admin dashboard.
- Go to Plugins → Add New Plugin.
- Click Upload Plugin at the top of the page.
- Click Choose File and select the Novamir
.zipyou just downloaded. - Click Install Now, then click Activate Plugin.
Once activated, a new Nova tab appears in the top-left area of your WordPress admin toolbar. Everything Claude-related lives here from this point forward.
📷 Screenshot tip: Show the WordPress plugin upload screen with the Novamir .zip selected. Alt text: “WordPress Add New Plugin screen with Novamir zip file selected for upload”
How Do You Configure Novamir After Installing It?
Click the Nova tab in your admin bar and select Configuration. Inside the configuration panel, do three things in order:
- Check “Turn On AI Abilities” — this enables the plugin to accept and execute commands from Claude.
- Click Save Settings.
- Click Generate Application Password — Novamir creates an application password that authenticates Claude’s access to your site through WordPress’s native security system.
Once that’s done, scroll to the very bottom of the configuration page. You’ll see a link that reads “Need the JSON configuration?” — click it. This is where the real setup happens.
📷 Screenshot tip: The Novamir configuration panel with “Turn On AI Abilities” checkbox checked. Alt text: “Novamir WordPress plugin configuration panel with AI abilities toggle enabled and JSON configuration link visible at bottom”
How Do You Get the JSON Configuration for Claude Desktop?
After clicking the JSON configuration link, Novamir shows you a code block customized for your specific WordPress site. You’ll see options for different platforms — select Claude Desktop.
A block of JSON configuration code appears on screen. Select all of it and copy it. This code contains your site’s URL and authentication details pre-formatted for Claude Desktop.
This same JSON works for both Windows and Mac — the setup process is identical on both operating systems.
⚠️ Mac users note: Your Claude Desktop config file may be named
claude_config.jsoninstead of the default name. The content and process are identical — only the filename differs.
How Do You Paste the Configuration into Claude Desktop?
Open the Claude Desktop app on your computer. Then follow these exact steps:
- Click Settings in the top menu.
- Click on the Developer tab.
- Click Edit Config — this opens a
.jsonconfiguration file in your default text editor. - Select everything inside the file (Ctrl+A on Windows / Cmd+A on Mac) and delete it.
- Paste the JSON code you copied from Novamir.
- Go to File → Save.
Critical: Use Save, not Save As. Choosing “Save As” creates a duplicate file and Claude will reload the old empty config when it restarts — the connection won’t work.
- Close the config file.
- Fully close Claude Desktop — don’t just minimize it. Right-click the taskbar icon and choose Quit, or use Cmd+Q on Mac.
- Reopen Claude Desktop.
📷 Screenshot tip: Claude Desktop developer config file open in text editor with Novamir JSON pasted in. Alt text: “Claude Desktop developer config JSON file with Novamir WordPress configuration code pasted and ready to save”
How Do You Verify That Claude Is Connected to WordPress?
Once Claude Desktop reopens:
- Go to Settings → Developer.
- You’ll now see Novamir listed as an active connected integration with a green status indicator.
For a second confirmation, open a new chat in Claude. Click the + (plus) icon next to the message input. Under Connectors, you’ll see Novamir listed alongside your actual WordPress domain.
To test the live connection, type this in chat:
“Are you connected to my website?”
Claude will confirm the connection and your site’s URL. You’re live.
How Do You Use Claude to Create Pages and Content in WordPress?
Once connected, Claude executes WordPress tasks through plain-English commands typed in the chat window. Start with something simple to confirm everything works:
“Create a page called Services.”
Go to Pages → All Pages in your WordPress dashboard. The Services page is there — created in seconds without you touching the WordPress editor.
From there, you can give Claude progressively more complex tasks. Here are real commands that work:
- “Write a 600-word blog post about email marketing tips and publish it as a draft.”
- “Create a WooCommerce product called Blue Widget, set the price to $29, and add it to the Shop category.”
- “Update the headline on my homepage to say ‘We Build Websites That Actually Convert’.”
- “Add a contact form shortcode to the Contact page.”
Every one of these executes directly in WordPress. No copy-pasting. No clicking through menus.
How Do You Build a Full Page with Elementor Using Claude AI?
This is where the integration gets genuinely powerful and where most tutorials skip the details that actually matter.
Before giving Claude a page-building command, configure two Elementor settings:
Should You Disable the Atomic Editor in Elementor?
Yes. Go to your Elementor settings and deactivate the Atomic Editor if it’s active. The Atomic Editor uses a different element structure that can cause Claude to produce layouts that aren’t cleanly editable. Deactivating it takes 10 seconds and saves you headaches later.
Why Should You Enable Containers in Elementor Before Using Claude?
Inside Elementor → Features, set Containers to Active (not Default).
When Containers are left at Default, Claude sometimes builds pages using the older Sections and Columns structure — a layout system Elementor has moved away from. With Containers active, Claude uses the modern Flexbox system, which produces cleaner, more responsive layouts that are easier to edit afterward.
What Prompt Should You Give Claude to Build an Elementor Page?
Once those settings are in place, give Claude a specific, detailed prompt:
“Create an award-winning dog grooming website with vibrant colors for the page named Services. Use Elementor containers — not atomic elements. Include a hero section, services grid, testimonials, and a contact CTA. Be creative and make the design high-fidelity.”
Claude will build the full page sections, headings, buttons, testimonials, footer using actual Elementor widgets, not HTML code blocks.
What Happens If You Don’t Tell Claude to Use Elementor Elements?
If you skip the instruction to use Elementor elements, Claude defaults to raw HTML widgets for every section. The page renders in the browser, but nothing is editable inside Elementor the normal way. Every element sits inside a locked HTML block. You’d have to rebuild it from scratch to make design changes.
Telling Claude explicitly to use Elementor containers and widgets gives you a page where every heading, button, and image is an editable Elementor widget you can modify with a click.
📷 Screenshot tip: Side-by-side of Elementor editor showing a widget-built section vs. an HTML widget block. Alt text: “Elementor editor showing Claude-built page using proper Elementor heading and button widgets versus raw HTML widget fallback”
Is Novamir Pro Worth Buying?
The free version of Novamir handles the full connection and lets Claude create and edit WordPress content. For most users, it’s enough.
The Pro version does one specific thing differently: it gives Claude deeper knowledge of Elementor’s design system. With that context, Claude makes better layout decisions — more intentional use of spacing, visual hierarchy, and design contrast — right from the first prompt, without you needing to guide it step by step.
I tested both versions. The difference is real, especially for landing pages and service pages where design quality matters.
Novamir Pro pricing (one-time, not subscription):
| License | Price | Sites Covered |
|---|---|---|
| Starter | ~$49 | 3 websites |
| Agency | ~€99 | 1,000 websites |
For individuals and small businesses managing a few sites, the $49 Starter license covers you. For freelancers or agencies billing clients for WordPress builds, the €99 agency license pays for itself on the first project.
Neither is required. The free version works. But if you’re using Claude to build pages for clients or your own business, Pro is worth the one-time cost.
Does Claude AI Work Better on Windows or Mac for WordPress?
From personal testing across both platforms: Windows performs more reliably for this specific workflow.
On Mac, the most common issues are config file path errors, the “Save As” trap creating duplicate config files, and occasional failures where Claude reopens but doesn’t recognize the updated configuration. None of these are dealbreakers they’re solvable but they add friction that Windows users don’t encounter.
Both platforms are fully supported. If you’re on Mac and running into issues, the most common fix is confirming you’re editing the right .json file and that you saved with Cmd+S (Save), not Cmd+Shift+S (Save As).
What Can Claude AI Actually Do Inside WordPress?
Once the Novamir connection is active, Claude can handle a wide range of real WordPress tasks through chat commands:
- Create new pages and posts with full content
- Write, format, and publish blog articles as drafts or live posts
- Build complete landing pages in Elementor using containers, headings, buttons, and image sections
- Edit existing page copy — headlines, body text, CTAs, meta descriptions
- Fix broken shortcodes or code snippet errors
- Insert custom HTML or CSS into specific pages
- Create and configure WooCommerce products
- Add or reorganize navigation menu items
- Debug layout problems by describing the issue in plain English
These aren’t theoretical capabilities. Each one executes in your live WordPress environment through the Novamir bridge, without you opening the WordPress editor at all. That’s why, You should connect Claude AI with wordpress in order to automate content.
Frequently Asked Questions About Connecting Claude AI to WordPress
Is Novamir free to use?
Yes. The core Novamir plugin is completely free to download and install in order to connect claude ai with wordpress. A Pro version is available for a one-time fee and adds enhanced Elementor design intelligence. The free version is fully functional for all basic and intermediate WordPress tasks.
Does connecting Claude AI to WordPress work with Gutenberg?
Yes. Claude works with Gutenberg blocks as well as Elementor. You don’t need a third-party page builder the integration adapts to whatever editor your site uses. Elementor users get more design-specific functionality, but Gutenberg sites are fully supported.
Do I need to know how to code to set this up?
No coding knowledge is required at any step. The entire setup is downloading a plugin, copying and pasting a JSON code block, and restarting an app. There’s no terminal, no API key management, and no PHP to touch. You just need to connect Claude AI with wordpress.
How does Novamir authenticate with WordPress, Is it secure?
Novamir uses WordPress’s native Application Password system for authentication. This is the same standard used by trusted integrations like Jetpack and WooCommerce’s REST API. Your credentials are stored locally in the Claude Desktop config file, not on any external server.
Can Claude AI accidentally delete or break content on my WordPress site?
Claude executes whatever you ask it to do. If your prompt instructs it to delete a page, it will delete it. Best practice: always test this workflow on a staging environment before running Claude commands on a live production site. Make a backup before your first session.
Does this integration work on managed WordPress hosts like WP Engine, Kinsta, or Flywheel?
It should work on most managed hosts, provided the host allows REST API connections and you have admin-level plugin install access. Some managed hosts apply extra security restrictions on external API calls. If the connection fails on a managed host, check your host’s REST API settings or contact their support team.
What is MCP and why does Claude use it for WordPress?
MCP stands for Model Context Protocol — an open standard that lets AI models like Claude connect to external tools and services through a standardized interface. Novamir implements an MCP server for WordPress, which is why Claude Desktop can read from and write to your WordPress site directly through the chat interface.
Will this work with Claude on the web (claude.ai) or only with Claude Desktop?
Currently, this specific Novamir integration requires Claude Desktop because it relies on the local MCP configuration file. The web version of Claude at claude.ai does not support custom MCP connections in the same way. You need the desktop app installed on your computer.
Video Source:
Tool: Claude AI










Leave a comment